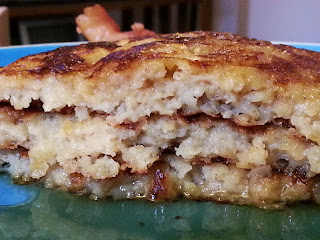
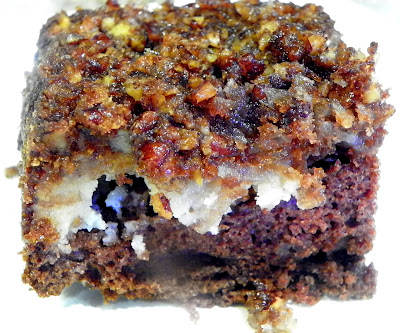
Tuesday, February 19, 2013

French Style Bread in an Hour

I think it has been well established that I love bread, good bread.  Fresh from the oven, warm and tasty.  It is so incredibly good that it is hard to resist.  Someone told me recently that good fresh bread is like crack, you can't resist eating it.  I have to agree.

Now I usually say to wait for the loaf to cool before cutting into it so it doesn't dry out but this loaf is so quick and easy to make that I say cut as soon as you like.  It won't last long so grab some cheese, tomatoes, salami, butter, jam or whatever you like best with fresh bread and dig in.

The dough has A LOT of oven spring (initial quick rise in the first few minutes after putting the dough in the oven) so when shaping your loaves keep in mind that they will double or maybe triple in size (around not in length).

French Style Bread

2-1/4 cups warm water
3 Tablespoons canola or vegetable oil
5-1/2 to 6 cups All purpose flour
3 Tablespoons instant yeast
2 Tablespoons sugar
2 teaspoons kosher salt (I use Morton's)

Preheat your oven to 425 degrees (400 if using convection).

Combine all the ingredients in the order they are listed above (when adding the flour begin with 5-1/2 cups of flour for now) in your mixing bowl.  Knead in a stand mixer for about 6-7 minutes adding more flour if needed to get a soft dough that barely cleans the side of the bowl and is a little tacky.  Leave dough in the mixing bowl, cover it with a towel and allow to rise for 15 minutes.  If kneading by hand, knead for about 12 minutes until you have a soft slightly tacky smooth dough, then place in the mixing bowl and cover with towel to rise for 15 minutes.

Prepare a jelly roll pan or large cookie sheet (preferably with an edge on all 4 sides) by spraying with nonstick spray.  Spray your counter with nonstick spray and remove dough from bowl and place on the counter.  Divide dough in half.  Form each half into a long thin loaves.  The dough will bulk up in the oven 3-4 times the size of the initial loaves you form so keep them long and thin, I usually have them almost as long as the jelly roll pan.  Slash diagonally each loaf 3-4 times with a very sharp knife or razor blade.  Brush each loaf lightly with water if you like and put it in the oven.  

Bake for 23-28 minutes until a deep golden brown (interior of loaf should read 195-200 on instant thermometer if you are not sure).  Remove from oven, remove loaves from pan and place on a cooling rack and allow to cool.
 

Monday, January 28, 2013

Life, turkey sandwiches and so much more

Life has a habit of throwing you a curve ball just when you least expect it. Last year life decided to not only catch me off guard but to knock me on the head too. Several times. Two deaths, one pregnancy, one car theft, and many broken necessary and costly items to replace just to begin with. As much as I love being able to share things on this blog I just had to set it and a few other things aside and deal with life. I have thought many times about how much I would love to get back to writing here but I just needed some time. I am happy to be back and although this is not much of a food post (there are two short and simple recipes at the end) I wanted to share some of what life has brought me. I have several posts planned, including the dressing that Carol says she is addicted to, and look forward to sharing them.

One of the big things our family has done, is welcome a new member.  My daughter Tara was pregnant so a baby shower was in order. She was due on January 10, 2013, but with holidays coming up and I decided to have the shower in November. It was decided that the shower would be Jungle themed and in order to eliminate the need to transport food and gifts (I wasn't sure I would have a vehicle yet) that we would do it in our home.

We kept it simple and served pesto turkey and provolone sandwiches, macaroni salad, fresh fruit, cucumber bites with hummus, caprice salad bites, spinach and artichoke dip with pita chips and olive Tapenade on toasted baguette slices.


We had these cute glass bottles with striped paper straws with a paper leaf on twine for everyone to write their name and hang around the neck of the bottle.  We served a bubbly apple drink much like sparkling cider.


We had two cupcake flavors.  Chocolate with chocolate frosting topped with a sugar sheet green leaf and vanilla bean with vanilla butter cream frosting topped with a dried pineapple flower.


Two dear friends, Jezebel and Kathleen, came over early and helped set up and prepare and plate some of the food.  My sister Lisha, brother Adam and sister in law Marie also arrived early and helped by putting the sandwiches together which allowed me to actually go upstairs and change and even put on a little make up.  I don't know what I would have done without them.  They were amazing!

There were so many kind people who supported my daughter and wanted to be included and I am thankful that many understood that our space is limited. We are so thankful to be surrounded by them and we appreciate them so much.  In the end we had over 40 people in my living room and dining room, it was definitely a full house.

Tara had several trips to the hospital with early contractions. Luckily he decided to allow mommy to finish her finals and arrived four days later. She gave birth to my first grandchild, August Ira Huang on December 16, 2012.  He arrived almost four weeks early but already weighed 7 pounds 10 ounces and was 19-3/4 inches long.  I think he may the most perfect child I have seen since my kids were born, but I may be the slightest bit biased.  Babies have a way of making life better and August definitely has made all our lives better. 


As for the recipes, like I said they are short and sweet this time. The sandwiches were a hit and part of the reason is the pesto sauce.  I bought some soft Torta rolls from Costco, and we put thick sliced turkey breast, a slice of provolone cheese, romaine lettuce and tomatoes on the sandwich with the pesto sauce on one of the side of the roll.  It makes for a quick and easy lunch that looks like you went to more trouble that you really did.  We wrapped the sandwiches in parchment paper. put a toothpick in both halves and sliced them in half.  You could also tie them with bakers twine.


Pesto Sauce

1/2 cup mayonnaise
1/3 cup prepared pesto sauce

Combine the mayonnaise and pesto sauce.  Store in the refrigerator until ready to use.

Sparkling cider
This drink is much like the bottled sparkling apple cider but possibly better.

2 cans frozen apple cider concentrate
1 - 2 liter bottle club soda

Keep both the cider concentrate and club soda cold.  Pour cider concentrate into a pitcher, punch bowl or dispenser.  Add the club soda and mix just enough to combine completely if needed.  Stirring pops the bubbles so it is best not to stir or stir very minimally if needed.  I usually pour the club soda in while moving the bottle in a circular motion so it mixes as it is poured in.

Tuesday, May 22, 2012

The Ultimate Blog Swap - Baked Buffalo Chicken Pasta

Today I’m participating in the Ultimate Blog Swap. You’ll find me posting over at Bake Break! about Blackberry Sour Cream Coffee Cake, and I’m excited to welcome Liz from The Fresh Plate to From the Mind of Laura:


Hello everyone! I am Liz, and I blog over at The Fresh Plate . I am so excited to be guest posting for you here today. Laura has a great blog, and I  am honored to be a part of it ion any little way I can. 

First off, I racked my brain trying to figure out what recipe I was going to make for Laura.  I wanted to make something that was budget - friendly, kid- friendly and easy to put together. I finally ended up choosing Baked Buffalo Chicken Pasta. I have four sons, ranging in ages from 18 to 6, and they all love buffalo flavored dishes. And pasta. And cheese. You get the picture. This dish is chock full of buffalo flavor and easy enough to put together in the morning and pop in the oven at dinnertime.  You could even add shredded carrots or chopped celery to give it a nice crunch. I would add those if I made it for adults, my my texture-phobic kids would pick them out and set them to the side, so I wouldn't waste my time or energy if I was making it just for us. And as you can see in the recipe, it calls for scallions and cilantro, which I did add to mine and two of the four kids. Two picky eaters and the hubs do not care for either, so I added hem when I plated them. Serve with a side salad and slices of garlic bread and you have a great meal. 

Baked Buffalo Chicken Pasta

1 box pasta of your choice
1 1/2 lbs chicken tenderloins, cooked and cut into cubes
1 T butter
1 T all purpose flour
1 1/2 cup whole milk
1/3 cup grated monterey jack cheese , plus more for sprinkling on top
1/3 cup sharp cheddar cheese, plus more for sprinkling on top
1/3 cup buffalo sauce ( I use Frank's Red Hot)
1/2 cup Ritz cracker crumbs 
1/2 cup scallions, chopped
1/2 cup cilantro, chopped 

1.Preheat oven to 375 degrees. 
2.Cook pasta according to  directions and set aside.
3.While the pasta is cooking, heat a medium saucepan over medium heat.Add the butter.
4.When the butter is melted and beginning to bubble slightly, add the flour. Whisk the butter and the flour constantly to create a thick sauce  for about a minute, until the sauce becomes  golden in color.
5.Add the milk to the sauce, turn down the heat to low and whisk until the milk thickens into a creamy sauce.
6.Add in the monterey jack and the cheddar cheeses and stir until the cheese melts into the sauce.Add the buffalo sauce. Taste to see if you need to add more sauce to your liking. I tend to stay at 1/3 cup.
7.Spray a 9x13" baking dish with non stick cooking spray. Mix the pasta and the cubed chicken together in the baking dish and pour the sauce over it.
Stir and combine the ingredients well. (you can add more cheese at this point if you are a cheese lover) 
8.Sprinkle the casserole with cracker crumb and a bit of salt and pepper. 
9.Bake for 25-30 minutes or until the cheese is golden and bubbly.
10.Remove from the oven and let cool slightly before serving.
* Add scallions and cilantro if desired.


So there you have it! Baked Buffalo Chicken Pasta. Thank you again, wonderful readers, for allowing me to share a recipe with you. And thank you again to Laura, who was so gracious and accommodating throughout this whole process . I hope to see you guys over at Fresh Plate in the very near future. Leave a comment and let me know you saw me here! 

Liz

Visit Life Your Way to see all of the Ultimate Blog Swap participants!

Tuesday, May 15, 2012

Upside Down German Chocolate Cake

My sweet friend Tina's son came to me one day and told me about a cake that he loves to get from a little bakery he goes to.  He aked me if I would be able to made something like it.  After hearing about it I knew I had to do it.  Chocolate cake with gooey coconut pecans and globs of cream cheese frosting, definitely a winner!
There are many versions of this cake out there so I decided to go with what I like best.  I love a caramalized topping and a moist, so good you just want to want to lick your plate, cake.  I invited him over for a BBQ and had this cake ready for him to try.  He said it was a little different than what the bakery does but declared it a winner.  And as usual my family and friends also acted as guinea pigs and loved it, except for Nathan, he hates coconut so he scrapped off the topping and then agreed it was perfect.
This cake is is good when you may not have the time to put together a layer cake or need to travel with it and worry about it falling over.  I have to say, sitting here typing this makes me want to go to the kitchen and make it now.

Upside Down German Chocolate Cake

1/2 stick butter + 1/2 stick butter, softened
1 cup chopped pecans
1 cup coconut
1 German chocolate cake mix
1/2 cup sour cream, optional (makes cake even moister)
3 eggs (as directed on cake mix box)
Oil (as directed on cake mix box)
Water (as directed on cake mix box)
8 oz cream cheese, softened
2-4 cups powdered sugar, to taste
1 teaspoon vanilla extract

Preheat oven to 350 degrees.
Spray a 9 x 13 baking pan with non stick oil spray.  Melt 1/2 stick of butter and pour into the bottom of the bakign pan.  Sprinkle melted butter with pecans and coconut. 
Mix the cake as directed on the box adding sour cream if you desire.  In a medium mixing bowl combine the softened cream cheese, softened butter and 2 cups of powdered sugar.  Mix on medium speed until smooth, taste add vanilla and more powdered sugar to desired sweetness.  Pour cake batter into baking pan, spread evenly.  Drop small dallops of the cream cheese mixture all over the cake batter.

Bake 45- 50 minutes until cake springs back when lightly touched.

Allow to cool and serve by cutting out a piee and flipping it over on the place so that coconut pecan layer is on the top.
Note:  If you would like to be able to flip the whole cake out of the pan onto a platter to serve I recommend lining the pan with parchment paper before spraying with oil and pouring in the melted butter.  Allow to cool about 15 minutes before flipping it onto a platter.

Monday, May 7, 2012

Sweet and Spicy Chicken

I was sitting in my office one afternoon wondering what I was going to make for dinner.  I remembered I had purchased a fresh pineapple a few days before and decided I really wanted to have something with chicken and pineapple.  I remembered that a certain Chinese fast food restaurant has a sweet hot chicken with pineapple and knew I would be trying to recreate that.  I love the combination of sweet and spicy with the crunch of the vegetables and the tang of the pineapple.  

As I was making dinner that night my daughter and her boyfriend came in and tried the sweet chili sauce I had made and declared it better than that certain restaurant.  I liked that the flavors are fresh, the chicken isn't battered and deep fried and I can add as many vegetables and as much pineapple as I desire.  

When making the sauce I used fish sauce which can be found in the Asian section of your grocery store or at most Asian markets.  It is usually only a few dollars for a 750 milliliter bottle.  If you can't find it locally you can order it here on Amazon.  It can also be used to make curry and many other Asian sauce and soups.

I chose to use a blend of juices because that is what I had on hand but mixing these juices in any combination or using only one or two of them will work fine also.  This recipe makes about 2 1/2 cups worth of sauce so there is plenty to use as a dip for chicken fingers or spring rolls, coating chicken wings,  sauce for pork and shrimp or what ever else you would like.

Sweet and spicy chicken stir fry
Serves 4-6

2 pounds boneless skinless chicken breasts, cut into 1 inch pieces
1/4 cup cornstarch
2 Tablespoons canola or vegetable oil
1 1/ 2 - 2 bell peppers (red, yellow and/or red - your choice), cut into 1 inch pieces
1 medium onion,chopped into 1 inch pieces
2 cups pineapple chunks or 20 ounce pineapple chunks, drained (may reserve the juice to use in sauce)
Sweet Chili Sauce (recipe below)

Place chicken in a gallon size Ziploc bag with the cornstarch.  Seal bag and shake to coat chicken with the cornstarch.  Heat oil in in a large skillet over medium high heat.  Add 1/2 the chicken to the skillet and cook until lightly browned and until juices run clear.  Remove chicken from skillet and set aside.  Add another tablespoon of oil to the skillet and repeat with remaining chicken. 

Raise heat to high and add onions to the skillet and cook for 2 minutes.  Add peppers and pineapple, cook until peppers soften slightly but are still crisp, about 2 - 3 minutes.  

Add chicken back into the skillet, stir to combine with onions, peppers and pineapple.  

Add 3/4 cup to 1 cup sweet chili sauce to taste. Stir quickly to coat. Remove from heat immediately and serve.


Sauce:
1/2 cup rice vinegar  
1/2 cup white wine vinegar
1 cup sugar
1/4 cup water
6 Tbsp. fish sauce
1 cup pineapple/orange/apple juice (I used a combination - “Lagers” brand)
5 cloves garlic, minced
1 teaspoon dried crushed chili  (may adjust to your own preference in heat)
3 Tbsp. cornstarch dissolved in 1/4 cup cool water

1.    In a small saucepan combine both vinegars, sugar, water, fish sauce, juice, garlic and dried chili.  Bring to a rolling boil over medium high heat
2.    Reduce heat to medium and allow sauce to boil until reduced by half (about 10-15 minutes).  Just before it is done boiling combine the water and cornstarch in a jar and shake it up to combine and dissolve the cornstarch.
3.    Reduce heat to low and slowly add the cornstarch-water mixture. Stir to combine.  Cook until the sauce has thickened, stirring often (2-3 minutes).
4.    Remove from heat and adjust taste if needed.  You may add more chili if you like it spicier, more sugar if you want sweeter.  If adding more chili or sugar allow the sauce to set for a few minutes to allow the flavors to combine. Typically you will initially taste sweet with a touch of sour following finishing with the spiciness.
5.    Use this sauce for spicy and sweet chicken stir fry or use to coat chicken wings for a “spicy Asian” wings.  It can also be used as a dip for chicken, pork chops, shrimp and spring rolls.

Sunday, April 29, 2012

Shepherds Pie

There are some people in my family won't eat certain foods as left overs.  It makes me a bit crazy sometimes.  Whether it is because it changes the taste or consistency they are very picky about what they will eat a second time around.  This dish is definitely NOT one of those. Ground meat and vegetables in it's own gravy all topped by mashed potatoes and a touch of Parmesan cheese and pepper.  This only gets better the next day.

The mashed potatoes used in this dish can be freshly mashed or from a box, the choice is yours.  I like to make an extra large amount of mashed potatoes for dinner on the weekend and then have plenty of left overs to use for this dish a few days later.  
 

Making these in individual ramekins just makes this fun for my family but it is also easily done in a 9 x 13 casserole dish.

Shepherds Pie

6 cups prepared mashed potatoes
2 Tablespoons olive oil
1 medium onion, chopped
1 pound lean ground beef
1 pound lean ground pork
1 teaspoon garlic powder or 1 clove garlic, minced
3 cups frozen mixed vegetables, thawed
1 3/4 cups beef broth
1 1/2 teaspoon Worcester sauce
3 Tablespoons all purpose flour
Salt and Pepper to taste
Freshly grated Parmesan Cheese, optional

Preheat oven to 375 degrees.

In a large skillet heat the oil and saute the onion until it is soft.  Add the beef and pork to the skillet and season with salt and pepper.  Cook the until the meats are cooked through and the juices run clear, breaking up the meats and stirring often. Add the broth, Worcester sauce and flour to the meat mixture and cook over medium heat until broth thickens slightly.  Stir in the thawed vegetables.  Season with additional salt and pepper to taste if needed.  

Pour meat and vegetable mixture into the bottom of a casserole dish or divide evenly between ramekins (I use a dozen 10 ounce ramekins). Top with mashed potatoes, pushing potatoes to the edge of your baking dish or ramekins, sealing in the meat and vegetable mixture beneath it.  Top with a sprinkling of freshly grated Parmesan cheese and a dash or two of freshly ground pepper if desired.  Bake for 30 minutes until lightly golden.  If baking in ramekins I find it best to place them on a cookie sheet and bakeg them on the cookie sheet.  Doing this makes it easier to move them in and out of the oven and avoids having to clean the bottom of the oven should some of them bubble over a little.   

Allow to cool 5 minutes before serving.


Wednesday, April 11, 2012

Kit Kat Cake and a Birthday

I have five adorable nephews one of which celebrated his 10th birthday last month.  And one thing he knows is that his auntie will make the cake he desires.  The one thing I can count on when it comes to his birthday cake is that it will include chocolate.  This year he decided he wanted a cake that would reflect his favorite candy bar, Kit Kat.  This was not a surprise as last year he wanted cupcakes, you guessed it, Kit Kat.  I decided that the cake would look like a normal chocolate cake on the outside but I would try to make the cake look like the layers of a Kit Kat when it was cut into. My nephew agreed to this but he had one stipulation, there MUST be Kit Kat pieces on top.  I think he was happy with the results.


Friends came over, pizza and cake were eaten and presents were opened.  We had a wonderful time socializing and celebrating this very important mile stone, the first decade of life.


Kit Kat Cake

Vanilla Buttermilk cake (make a double batch)

2-1/4 cups all-purpose flour
1/2 teaspoon baking soda
1-1/4 teaspoons baking powder
3/4 teaspoons salt
1/2 cup butter, room temperature
1-1/4 cups sugar
4  large whole eggs, room temperature
1 cups buttermilk, room temperature
1 teaspoons pure vanilla extract or vanilla bean paste
 
Preheat oven to 350 degrees. Grease and flour a 9 x 13 baking pan.  I used a deep roasting pan in order to insure it would not spill over while baking. REMEMBER - YOU NEED TO DOUBLE ALL INGREDIENTS.  Combine flour, baking soda, baking powder, and salt in a small mixing bowl.
 
With an electric mixer on medium-high speed, cream butter and sugar until pale and fluffy. Reduce speed to medium. Add eggs, beating until each is incorporated, scrape down sides of bowl as needed and continue to beat on medium heat until pale yellow. Reduce speed to low. Add flour mixture in three batches, alternating with two additions of buttermilk, and beating until combined after each. Beat in vanilla, continue beating for 1 minute.
 
Pour the batter into the prepared pan. Bake, rotating pan halfway through, until cake springs back when lightly touched and a cake tester inserted in center comes out clean, about 50-55 minutes. Transfer pan to wire racks to cool 20 minutes; turn  cake onto cooling rack and cool completely.
 
Chocolate Frosting (make a double batch if using for Kit Kat cake)
Very slightly adapted from Our Best Bites

2/3 cup granulated sugar
1/3 cup all-purpose flour
1 tablespoon unsweetened cocoa powder
3/4 cup milk
1/2 cup heavy cream
1 cup (2 sticks) real butter, softened
1 cup semi-sweet chocolate chips, melted


REMEMBER TO DOUBLE ALL INGREDIENTS.  Melt your chocolate chips and set aside to cool to room temperature.  chocolate shoud not harden but should still be stir-able and soft.

In a small saucepan, whisk together sugar, flour, cocoa, and milk. Bring it all to a low boil, whisking frequently. Boil 1-3 minutes or until thickened like a thinned pudding.  Do not allow to get too thick or the next step will be difficult.  Remove pan from heat and strain mixture through a mesh strainer, stirring and pushing it through and into a small bowl to remove any lumps. Cool completely in the refrigerator or freezer stirring occasionally.

When chocolate flour mixture is completely cooled, beat the butter until creamy, about 1 minute.  Beat in the cooled chocolate mixture until well combined fluffy, about 1 minute.  Finally add in cooled  melted chocolate and beat again until well combined and fluffy, about 2 minutes.  Spread frosting on  cake and use to decorate.

ASSEMBLE CAKE

Cut the cake into three even layers.  You may use a long serrated knife or a long piece of floss by wrapping it around the cake at the level you want to separate the layers, cross the ends of the floss and pull it through the cake.  Remove the layers.  

Place bottom layer of tray.  Spread a thin layer of chocolate frosting over the top of the bottom layer and top it with the second layer.  Spread another thin layer of frosting over the second layer and top it with the top layer.  Frost and decorate the cake as you like.